Building Beautiful TUIs in PHP with Laravel Prompts and Termwind
Laravel Prompts and Termwind bring polished terminal UIs to PHP developers. Learn to build interactive CLI tools your team will actually enjoy using.
Terminal UIs have had a quiet renaissance in the developer tools world. From Lazygit to btop, the era of the ugly text-only CLI is giving way to rich, interactive interfaces built entirely in the terminal. PHP developers have historically been left out of this movement — our CLI tooling was functional but rarely beautiful.
That changed with the arrival of Laravel Prompts and Termwind. Together, they give you everything you need to build polished, interactive command-line tools that work in any terminal — no GUI framework, no Electron, no browser required.
What Is a TUI and Why Does It Matter?
A Terminal User Interface (TUI) is an application that runs inside a terminal emulator but provides interactive, visually structured output — menus, progress bars, tables, forms — beyond simple text. The distinction from a plain CLI is interactivity: users can navigate, select, and input data through keyboard-driven interfaces without leaving the terminal.
For PHP developers, this matters in a few practical ways. You can build internal tools that your team uses daily without shipping a web interface. You can create scaffolding and generator tools that guide developers through complex setup. You can build deployment scripts, database management utilities, and project management tools that feel like products instead of scripts.
Laravel Prompts: Interactive Input Done Right
Laravel Prompts, released as a standalone package in 2023 and now a core part of Laravel’s Artisan tooling, provides a set of beautifully styled input components. They work in any PHP project — you don’t need a full Laravel application to use them.
composer require laravel/promptsText Input With Validation
use function Laravel\Prompts\text;

$name = text(
    label: 'What is the project name?',
    placeholder: 'my-awesome-project',
    required: true,
    validate: fn (string $value) => match (true) {
        strlen($value) < 3 => 'The project name must be at least 3 characters.',
        !preg_match('/^[a-z0-9-]+$/', $value) => 'Use only lowercase letters, numbers, and hyphens.',
        default => null,
    }
);
The validation closure returns a string on failure (the error message) or null on success. The prompt re-displays with the error message until the user provides valid input. This single pattern replaces the manual validation loops most developers write for CLI input.
Select and Multiselect
use function Laravel\Prompts\select;
use function Laravel\Prompts\multiselect;

$framework = select(
    label: 'Which framework?',
    options: ['laravel', 'symfony', 'slim', 'none'],
    default: 'laravel',
);

$features = multiselect(
    label: 'Which features do you want?',
    options: [
        'auth' => 'Authentication',
        'api' => 'REST API',
        'queue' => 'Queue system',
        'mail' => 'Mailer integration',
    ],
    default: ['auth'],
    required: true,
);
The multiselect component renders a checkbox list that users navigate with arrow keys and toggle with the spacebar. Selected items are returned as an array of the option keys.
Search With Autocomplete
For long option lists, the search component is a game-changer:
use function Laravel\Prompts\search;

$timezone = search(
    label: 'Select your timezone',
    options: fn (string $value) => strlen($value) > 0
        ? array_filter(
            timezone_identifiers_list(),
            fn ($tz) => str_contains(strtolower($tz), strtolower($value))
        )
        : [],
    placeholder: 'America/Chicago'
);
The options closure receives what the user has typed so far and returns matching options. This pattern works just as well with a database query:
$userId = search(
    label: 'Find user',
    options: fn (string $value) => User::where('email', 'like', "%{$value}%")
        ->limit(10)
        ->pluck('email', 'id')
        ->toArray()
);
Progress Bars and Spinners
For long-running operations:
use function Laravel\Prompts\progress;
use function Laravel\Prompts\spin;

// Progress bar with a collection
$results = progress(
    label: 'Processing records',
    steps: $records,
    callback: function ($record, $progress) {
        $progress->label("Processing: {$record->name}");
        return processRecord($record);
    }
);

// Spinner for a single async operation
$result = spin(
    callback: fn () => $apiClient->fetch('/heavy-endpoint'),
    message: 'Fetching data from API...',
);
The progress() function iterates over a collection (or any integer count) and returns the array of results from your callback — a clean pattern for batch processing with visual feedback.
Termwind: Tailwind for the Terminal
Termwind takes a different approach to terminal output. Instead of imperative cursor positioning, it lets you describe terminal output using HTML-like syntax with Tailwind-style utility classes.
composer require nunomaduro/termwindHere’s what traditional terminal output formatting looks like:
// Without Termwind
echo "\033[1m\033[32m✓\033[0m  {$name} created successfully\n";
And with Termwind:
use function Termwind\render;

render(<<<HTML
    <div class="mt-1">
        <span class="text-green-500 font-bold">✓</span>
        <span class="ml-1">{$name} created successfully</span>
    </div>
HTML);
The utility classes map to terminal concepts: text-green-500 sets the foreground color, font-bold enables bold text, ml-1 adds a margin-equivalent space, mt-1 adds a blank line above.
Building a Full Summary Panel
use function Termwind\render;
render(<<<HTML
<div class="my-1 mx-2">
<div class="px-2 py-1 bg-blue-500 text-white font-bold">
Project Created Successfully
</div>
<div class="mt-1">
<div class="flex">
<span class="text-gray-500 w-16">Name:</span>
<span class="font-bold">{$name}</span>
</div>
<div class="flex">
<span class="text-gray-500 w-16">Path:</span>
<span>{$path}</span>
</div>
<div class="flex">
<span class="text-gray-500 w-16">Framework:</span>
<span>{$framework}</span>
</div>
</div>
<div class="mt-1 text-gray-400 text-sm">
Run <span class="text-cyan-400">cd {$name} && composer install</span> to get started.
</div>
</div>
HTML);This renders a structured summary box with headers, labels, and values — output that actually reads like a professional tool, not a wall of text.
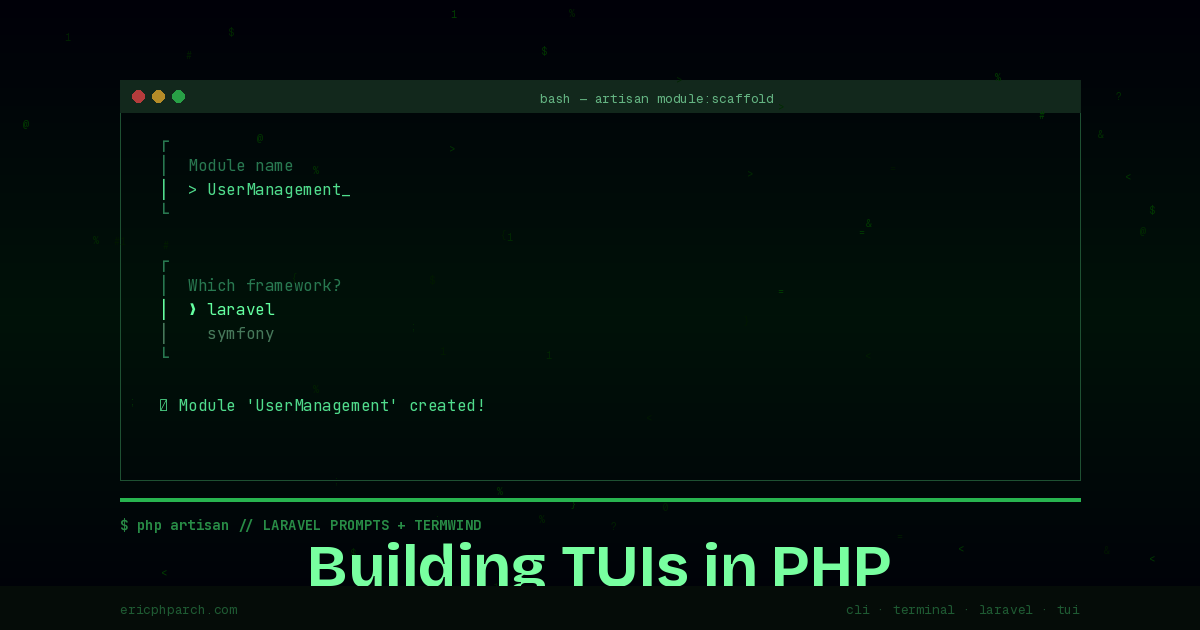
Putting It Together: A Project Scaffolding Command
Here’s a complete Artisan command that uses both libraries:
namespace App\Console\Commands;

use Illuminate\Console\Command;
use function Laravel\Prompts\text;
use function Laravel\Prompts\select;
use function Laravel\Prompts\multiselect;
use function Laravel\Prompts\confirm;
use function Laravel\Prompts\spin;
use function Termwind\render;

class ScaffoldModule extends Command
{
    protected $signature = 'module:scaffold';
    protected $description = 'Scaffold a new application module';

    public function handle(): int
    {
        $name = text(
            label: 'Module name',
            placeholder: 'UserManagement',
            required: true,
            validate: fn ($v) => !preg_match('/^[A-Za-z][A-Za-z0-9]*$/', $v)
                ? 'Module name must be PascalCase.'
                : null
        );

        $type = select(
            label: 'Module type',
            options: ['crud' => 'CRUD Resource', 'api' => 'API Only', 'service' => 'Service Layer'],
        );

        $features = multiselect(
            label: 'Include features',
            options: [
                'tests' => 'Feature tests',
                'policy' => 'Authorization policy',
                'events' => 'Domain events',
                'dto' => 'Data transfer objects',
            ],
            default: ['tests'],
        );

        if (!confirm("Create module '{$name}'?", default: true)) {
            $this->info('Aborted.');
            return self::SUCCESS;
        }

        spin(
            callback: fn () => $this->generateModule($name, $type, $features),
            message: "Generating {$name} module...",
        );

        render(<<<HTML
            <div class="my-1">
                <span class="text-green-500 font-bold">✓ Module created</span>
                <div class="mt-1 text-gray-400">
                    Files generated in <span class="text-cyan-400">app/Modules/{$name}</span>
                </div>
            </div>
        HTML);

        return self::SUCCESS;
    }

    private function generateModule(string $name, string $type, array $features): void
    {
        // Your scaffolding logic here
        sleep(1); // Simulate work
    }
}
Beyond Laravel: Standalone Usage
Both packages work outside Laravel. In standalone PHP or Symfony projects, use them directly:
#!/usr/bin/env php
<?php

require __DIR__ . '/vendor/autoload.php';

use function Laravel\Prompts\text;
use function Laravel\Prompts\confirm;
use function Termwind\render;

$host = text('Database host', placeholder: 'localhost', default: 'localhost');
$confirmed = confirm("Connect to {$host}?");

if ($confirmed) {
    render("<div class='text-green-500'>Connecting to {$host}...</div>");
}
The combination of Prompts and Termwind gives PHP developers a TUI stack that’s genuinely competitive with the Go and Rust CLI tools that have dominated this space. If you’re building internal tooling, developer experience tooling, or any CLI that people use daily, these two libraries are the most impactful additions to your PHP toolkit.
Sources:
- Laravel Prompts Documentation — Laravel
- Termwind on GitHub — Nuno Maduro
- Laravel Prompts Package — Laravel on GitHub